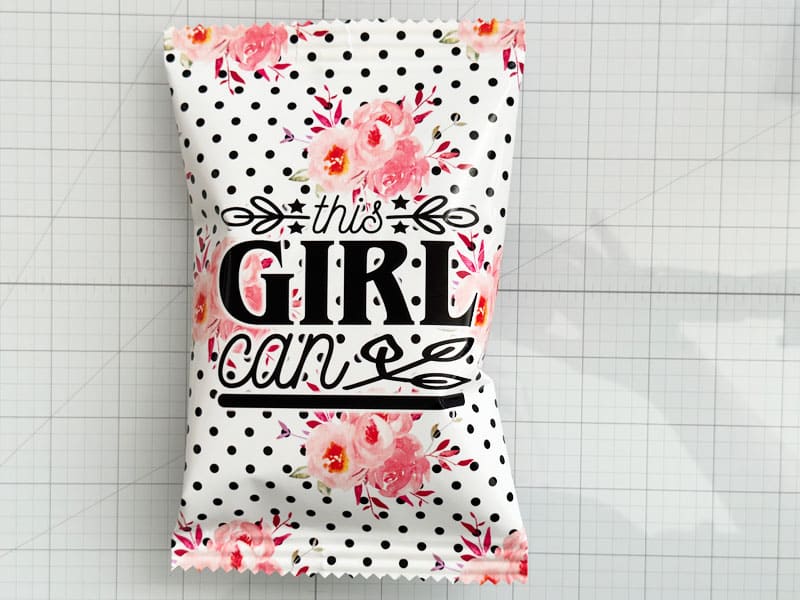
DIY Chip Bags: A Fun and Creative Way to Elevate Your Party Experience. Are you tired of using plain old chip bags for your parties and events? Why not add a personal touch to your gatherings with DIY chip bags? Creating your own chip bags using Canva can be a delightful and rewarding experience that will surely impress your guests. In this blog post, I will walk you through the step-by-step process of making a custom chip bag that will elevate your party experience to a whole new level.
Materials Required
This post contains some affiliate links for your convenience (which means if you make a purchase after clicking a link I will earn a small commission but it won’t cost you a penny more)! As an Amazon Associate I earn from qualifying purchases. Read my full disclosure policy.
- True White Glass Craft Mat – https://shrsl.com/418nx
- Chip Bag Template – https://bit.ly/3QfiLAt
- Nutrition Facts – https://bit.ly/3O7Pe8U
- Bar Codes – https://bit.ly/3KahczO
- Photo Paper
- Double Sided Tape
- Paper Trimmer
Process Video
Why Choose DIY Chip Bags?
DIY chip bags offer numerous advantages over store-bought ones. Firstly, they allow you to showcase your creativity and add a unique flair to your event. Whether it’s a birthday party, baby shower, or a casual get-together, personalized chip bags will make your guests feel special. Additionally, custom chip bags provide an opportunity to match the theme and colors of your party perfectly.
Getting Started with Canva
Canva is a user-friendly graphic design tool that will be your best friend on this DIY journey. Sign up or log in to Canva to begin your creative adventure. With a wide range of templates, graphics, and fonts at your disposal, designing your dream chip bags has never been easier.
Planning Your Design
Before diving into Canva, take some time to plan your design. Decide on the occasion or theme for your party. Download the chip bag template, the nutrition facts and bar codes from the links above.
Personalization and Customization
To make your chip bags extra special, consider personalizing each one for your guests. Add their names or a small note of appreciation to create a more intimate connection with your attendees. Customization is the key to making your DIY chip bags memorable and cherished.
Finalizing Your Design
Once you’ve perfected your chip bag design, give it a final review for any errors or inconsistencies. Save the design in a high-resolution format to ensure the best print quality. I saved mine as a PNG. Don’t hesitate to print a test copy before printing in bulk to make sure everything looks as expected.
Printing and Assembling Your DIY Chip Bag
Load your photo paper into your printer. After printing, cut the white edges off the photo paper. Use double-sided tape to secure the sides of the bag, creating a stylish and functional chip bag for your treats.
Adding Chips and Final Touches
Now that your DIY chip bag is ready, fill it with your favorite bag of chips or snacks.
Conclusion
DIY chip bags are not only a creative outlet but also a wonderful way to make your guests feel valued and appreciated. With the power of Canva and your imagination, you can transform simple chip bags into personalized party favors that will leave a lasting impression on your guests. So, the next time you’re planning an event, don’t settle for ordinary chip bags – embrace the DIY spirit and craft something extraordinary!
Until next time
Kathy

