
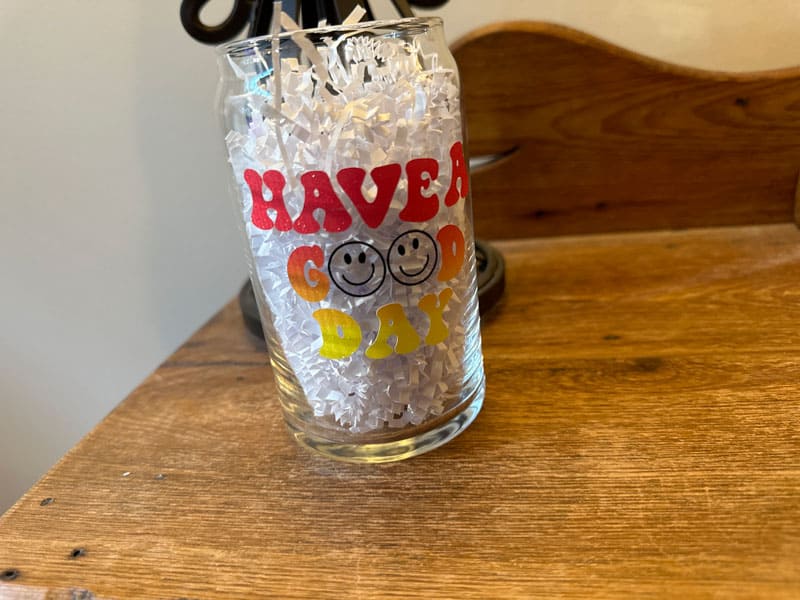
Here’s a fun tutorial where Creative Fabrica & Teckwrap Craft come together to create this adorable beer can glass. This cute SVG design and gorgeous vinyl make such a great combination.
Materials Needed
This post contains some affiliate links for your convenience (which means if you make a purchase after clicking a link I will earn a small commission but it won’t cost you a penny more)! As an Amazon Associate I earn from qualifying purchases. Read my full disclosure policy.
- Cricut Maker
- Cricut Explore
- Standard Grip Mat
- Cricut Tools
- Pin Pen
- Brayer
- Rainbow Stripes Vinyl
- Black Adhesive Vinyl
- Have A Good Day Smiley Face SVG
- Transfer Tape
- Beer Can Glass
- Alcohol Wipes
- Craft Squeegee
Are you a Cricut crafter who loves crafting and personalizing your own glassware? If so, I have an exciting project for you! In this tutorial, I will show you how to combine the creative resources of Creative Fabrica and the versatility of Teckwrap Craft vinyl to make a unique and fun beer can glass. So, let’s get started and create a one-of-a-kind beer can glass that will impress your friends!
Process Video
Step 1:
Download the svg design from Creative Fabrica using the link above. Once you’ve found the design, download the file and save it to your computer. Then upload it into Design Space.
Step 2:
Before applying the vinyl, it’s essential to clean the surface of the beer can glass. Use an alcohol wipe or alcohol and a cloth. This step ensures that the surface is free from oils or residues that may affect the vinyl’s adhesion.
Step 3:
The design you downloaded from Creative Fabrica will need to be resized. Measure the dimensions to fit your beer can glass, keeping in mind the area you want to cover.
Step 4:
Load the black vinyl and then the Teckwrap Craft vinyl sheet into your cutting machine and begin the cutting process.
Step 5:
After the cutting process is complete, carefully remove the excess vinyl around the design using a weeding tool.
Step 6:
Cut a piece of transfer tape slightly larger than your design. Peel off the backing of the transfer tape and place it over the vinyl design. Use a craft squeegee or a credit card to firmly press the transfer tape onto the vinyl, ensuring it adheres well.
Step 7:
Peel off the vinyl backing, leaving the design on the transfer tape. Align the design on the beer can glass, starting from one side. Slowly lay down the transfer tape with the vinyl onto the glass, smoothing it out as you go. Use the craft squeegee or credit card to press down firmly and remove any air bubbles or wrinkles.
Step 8:
Now it’s time to remove the transfer tape and reveal your beautifully applied vinyl design on the beer can glass. Follow these steps:
- Starting from one corner, slowly peel back the transfer tape at a 45-degree angle. Take care not to pull the vinyl off the glass along with the tape.
- If you notice any parts of the vinyl design lifting with the transfer tape, gently press them back onto the glass using your fingers or the craft squeegee.
- Continue peeling off the transfer tape until it’s completely removed, leaving behind the vinyl design adhered to the glass.
- Once you’re satisfied with the placement and appearance of the vinyl design, give it a final press with the craft squeegee or credit card to ensure a strong adhesion to the glass.
- Allow the vinyl to set and adhere to the glass for at least 24 hours before using or washing it. This will ensure that the design stays intact and lasts longer.
Conclusion:
By combining the creative resources of Creative Fabrica and the versatility of Teckwrap Craft vinyl, you can transform a simple beer can glass into a personalized and eye-catching piece. This DIY project allows you to showcase your style and creativity while enjoying your favorite beverage. So, gather your materials, and follow the steps outlined in this tutorial to create your very own fun beer can glass.

Until next time.
Kathy