
Last week I received the new Cricut Foil Transfer Kit and Transfer Sheets. It is used for adding accents to cards, invitations, gift boxes & more. The Foil Tool only works with the Cricut Maker and the Cricut Explore Air machines, and does not work with the Joy.
This post contains some affiliate links for your convenience (which means if you make a purchase after clicking a link I will earn a small commission but it won’t cost you a penny more)! Read my full disclosure policy.
This product has three interchangeable tips. Each tip has a different line on it, 1 line = fine, 2 lines = medium and 3 lines = bold. These lines determine the thickness of your foil lines. The Foil Tool fits in the B clamp of your machine.
Along with your Tool, and instructional booklet, you get 8 foil sheets measuring 4″ x 6.” 4 gold and 4 silver, as well as 4 sheets of tape. You can purchase the silver and gold Transfer Sheets in 12″x12.”
The foiling tip only works with the desktop version of Cricut Design Space. It does not work with the mobile app on an iPhone or iPad.
The instructional booklet is extremely helpful and explains everything. It also has tips on how to use your software when using the tool.
The foil sheets are pressure sensitive. They are not heat sensitive. When you apply pressure to the sheets, the foil will transfer onto whatever you are using behind it.
You can transfer the Cricut foil onto a lot of different materials. You can use things such as cardstock (light, medium, and heavy), faux leather, foil embossed paper, watercolor paper, pearl paper, adhesive backed paper, vellum, printable vinyl, and Kraft board. The smoother the surface is, the smoother your foil transfers will be.
Some Things I Learned Along The Way
Be sure when you are adding the tape to the edges of the foil that you leave a very narrow margin, so the foil tip doesn’t run over the tape, leaving an uneven transfer. I didn’t leave enough of a margin my first time foiling and had this happen.
I found that the tape is extremely sticky and works much better if you pat it on your clothing several times before using it.
Save your scraps of foil that don’t have any areas where the foil has already been transferred, and use them for other projects..
Supplies Needed
This post contains some affiliate links for your convenience (which means if you make a purchase after clicking a link I will earn a small commission but it won’t cost you a penny more)! Read my full disclosure policy.
Here’s What You Do To Make A Card
In Design Space click on Images, then Art Type and click on Draw Only. This brings up the line drawn images you can choose from to make your project.
I downloaded these designs from Design Space and added a shape the size of a 4.25″x5″ card. I also added text to the downloaded designs.
Add your text (Cricut Sans) is a good font for this. Make sure you are using a Writing font. Go to Line Type on the top toolbar and change it to Foil. You will then be give the option of Fine, Medium or Bold. Choose the one you want to use.
You can change the color of the foil to whatever foil color you are using, if you are using multiple colors of foil. Just click on the box right next to where it says Line Type, and a drop down menu will appear with different foil colors.
You must make sure everything is attached to the card shape before foiling and cutting.
Place your material on your mat. The foil must be placed, shiny side up, on top of your material that has been placed on the cutting mat.
Select settings.
If using cardstock use the Light Cardstock setting, even if your cardstock is a little heavier. Set pressure on Less for the Maker.
I no longer have an Explore Air 2 machine, so I am not able to test the pressure, however, I’ve read that it works well with the Default or More pressure setting.
Always do a test to see what works best for you.
It has been recommended that you move the star wheels to either side when foiling to keep them from leaving a mark on your project. I forgot to do this on my projects, but luckily they didn’t leave a mark.
Pay Attention
Pay attention to the instructions on your screen to see what tip you need to use for which part of your design (it will be what setting you used when setting up your design) you are foiling or cutting.
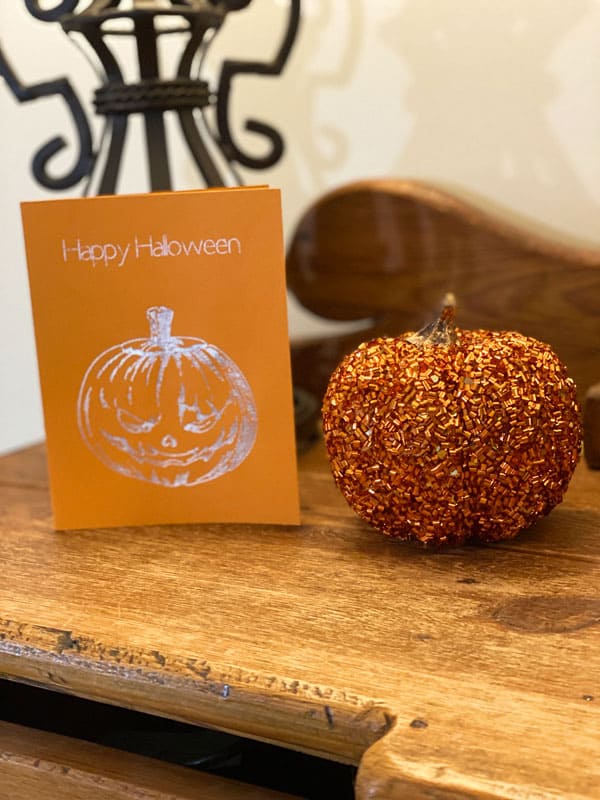
The Finished Cards
I hope you have as much fun as I am using the new Cricut Foil Transfer Kit and Transfer Sheets.
Until next time.
Kathy
P.S. If you like this tutorial, join my Facebook community where I post other free design files and resources! I look forward to crafting with you!
P.S.S. If you’re thinking about getting a Cricut and you aren’t sure which one to get, this article might help you in your decision making process. The Cricut Maker vs. The Cricut Explore Air 2.