

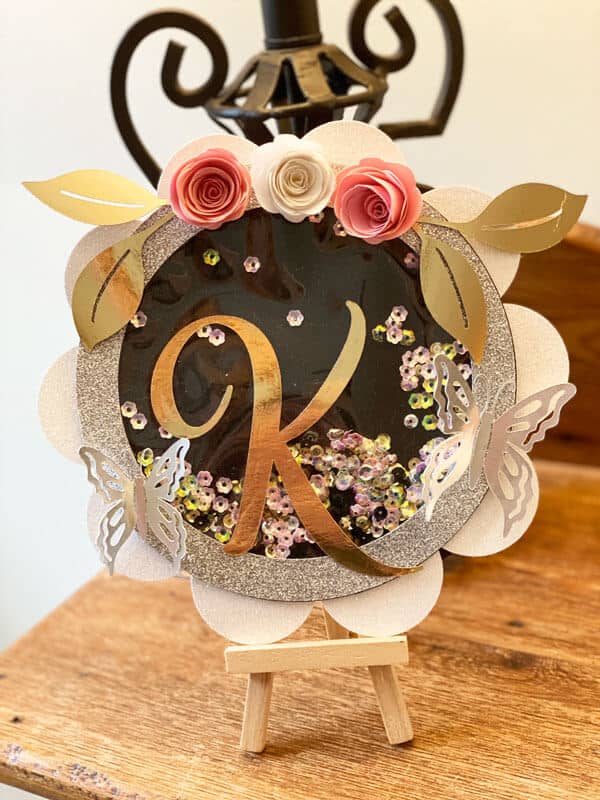
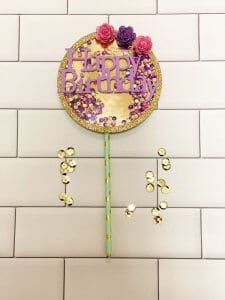
Another week has come and gone and hear we are on a Monday again. I’ve been getting so many great ideas from Instagram and Pinterest of things to make with my Cricut. This table decor made with the Cricut was inspired by a couple of people on Instagram. I couldn’t decide if I wanted to make another cake topper, kind of like the one I made previously. I ended up deciding to make this piece into a decoration for my side table.
You can get my free template, available in my Free Resource Library (get the password by filling out the form below).
Supplies You Will Need To Make This Project
This post contains some affiliate links for your convenience (which means if you make a purchase after clicking a link I will earn a small commission but it won’t cost you a penny more)! Read my full disclosure policy.
Quilling Tool
Sequins (I used iridescent white, gold ,black and iridescent pink.)
Making The Table Decor
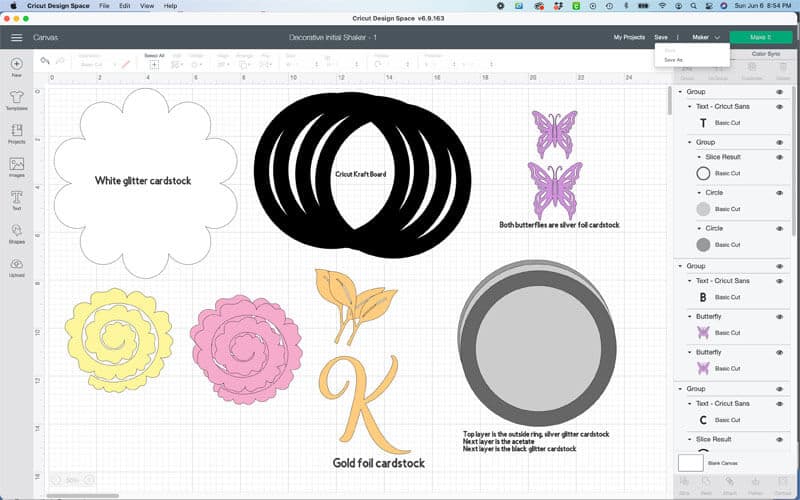
This whole project was cut on my Cricut Maker. Before you cut out any of the pieces, be sure to hide the words. Those are just a reference point so you know what goes where.
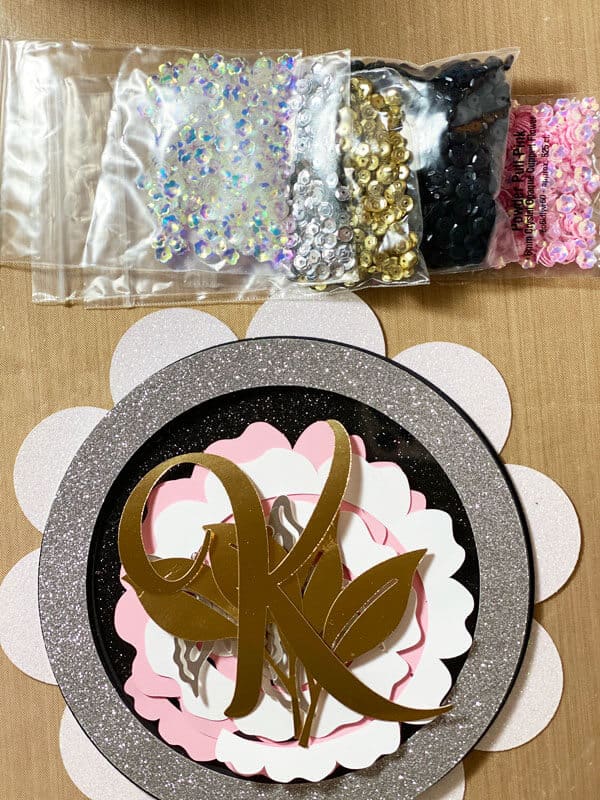
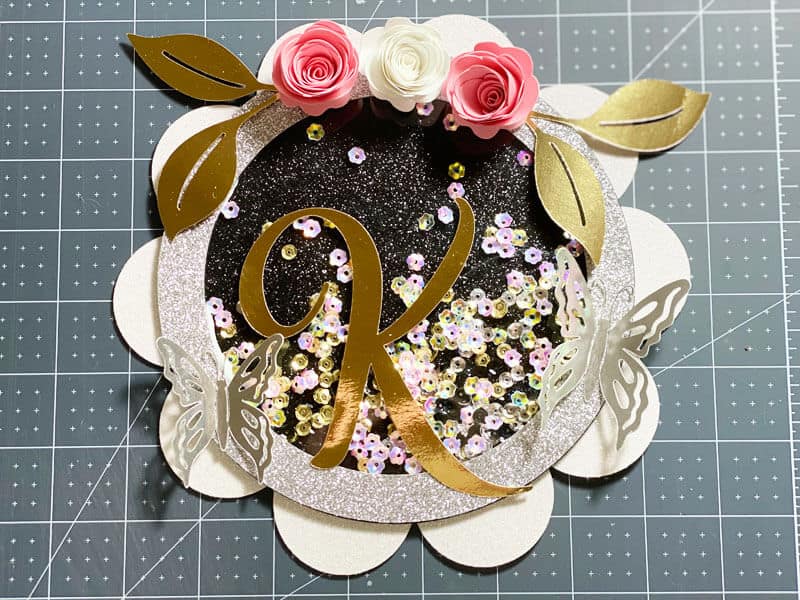
I used four 1.5mm pieces of Cricut Kraft Board cut on the 1.5mm setting on my Cricut Maker, using the Cricut Knife Blade and the Strong Grip Mat. Put a strip of Masking Tape around each edge of the Cricut Kraft Board to secure it in place on the mat. It will take approximately 12 passes to cut all the way through each one. I glued all four of these pieces together to make a well for the sequins. Next, I glued the acetate to the back of the top silver glitter cardstock piece. Then I glued the black glitter cardstock circle to the four pieces off Cricut Kraft Board that were glued together. After that I added the sequins to the well. Last, I glued the silver/acetate piece to the top of that.
After everything was glued down I rolled the flowers and added them to the top of the decor piece, gluing down the gold foil cardstock leaves underneath before gluing the flowers down. Lastly, I glued the initial K down and the leaves and butterflies as pictured.
Here’s a video of the process of putting the table decor together, which includes how to make the rolled flowers.
Will you try this table decor made with the Cricut? I’m hooked on any kind of shaker project. Do you like shaker projects? Let me know in the comments.
Until next time.
Kathy
P.S. You might also like this Easy DIY Cake Topper Made With Your Cricut.
https://kpeckscreativecafe.com/easy-diy-cake-topper-made-with-your-cricut/
You can get my free template, available in my Free Resource Library (get the password by filling out the form below).