
There was a cute idea to make this DIY teacher gift with your Cricut online, which I fell in love with. I changed the wording from what was on the original design to make it my own. I’m going to give it to my sister-in-law who is homeschooling my nephews.
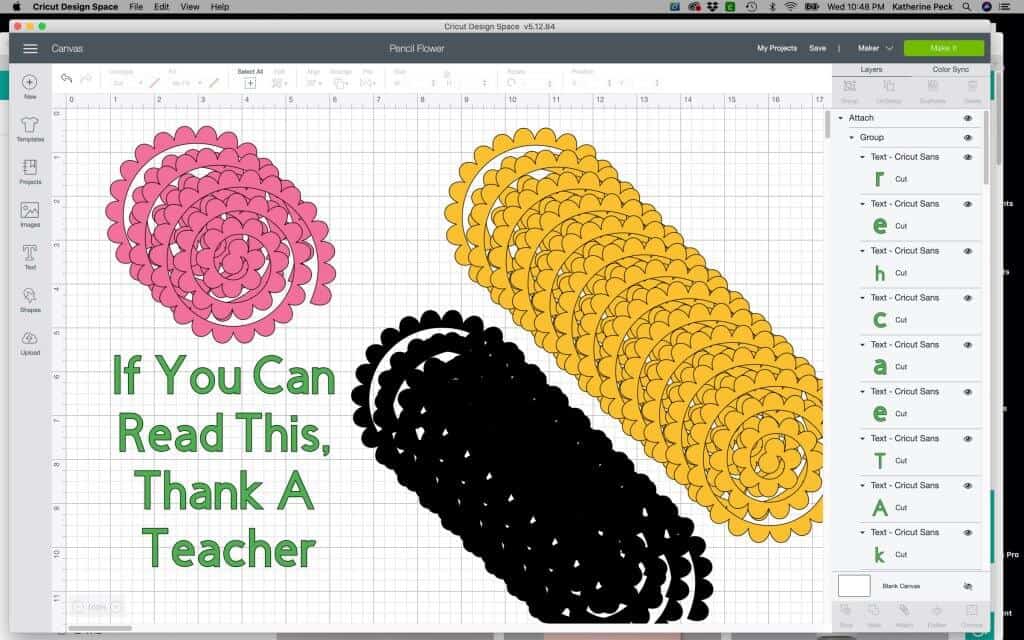
I created this file in Cricut Design Space. Get my free template (available in my Free Resource Library – get the password by filling out the form below).
Supplies Needed For This Project
This post contains some affiliate links for your convenience (which means if you make a purchase after clicking a link I will earn a small commission but it won’t cost you a penny more)! Read my full disclosure policy.
Pink Buttons 8.5″ x 11″ Cardstock
StarCraft HD Glossy Permanent Vinyl – Black
8″ x 8″ Shadow Box
How To Make The DIY Teacher Gift With Your Cricut
Get my free template (available in my Free Resource Library – get the password by filling out the form below).
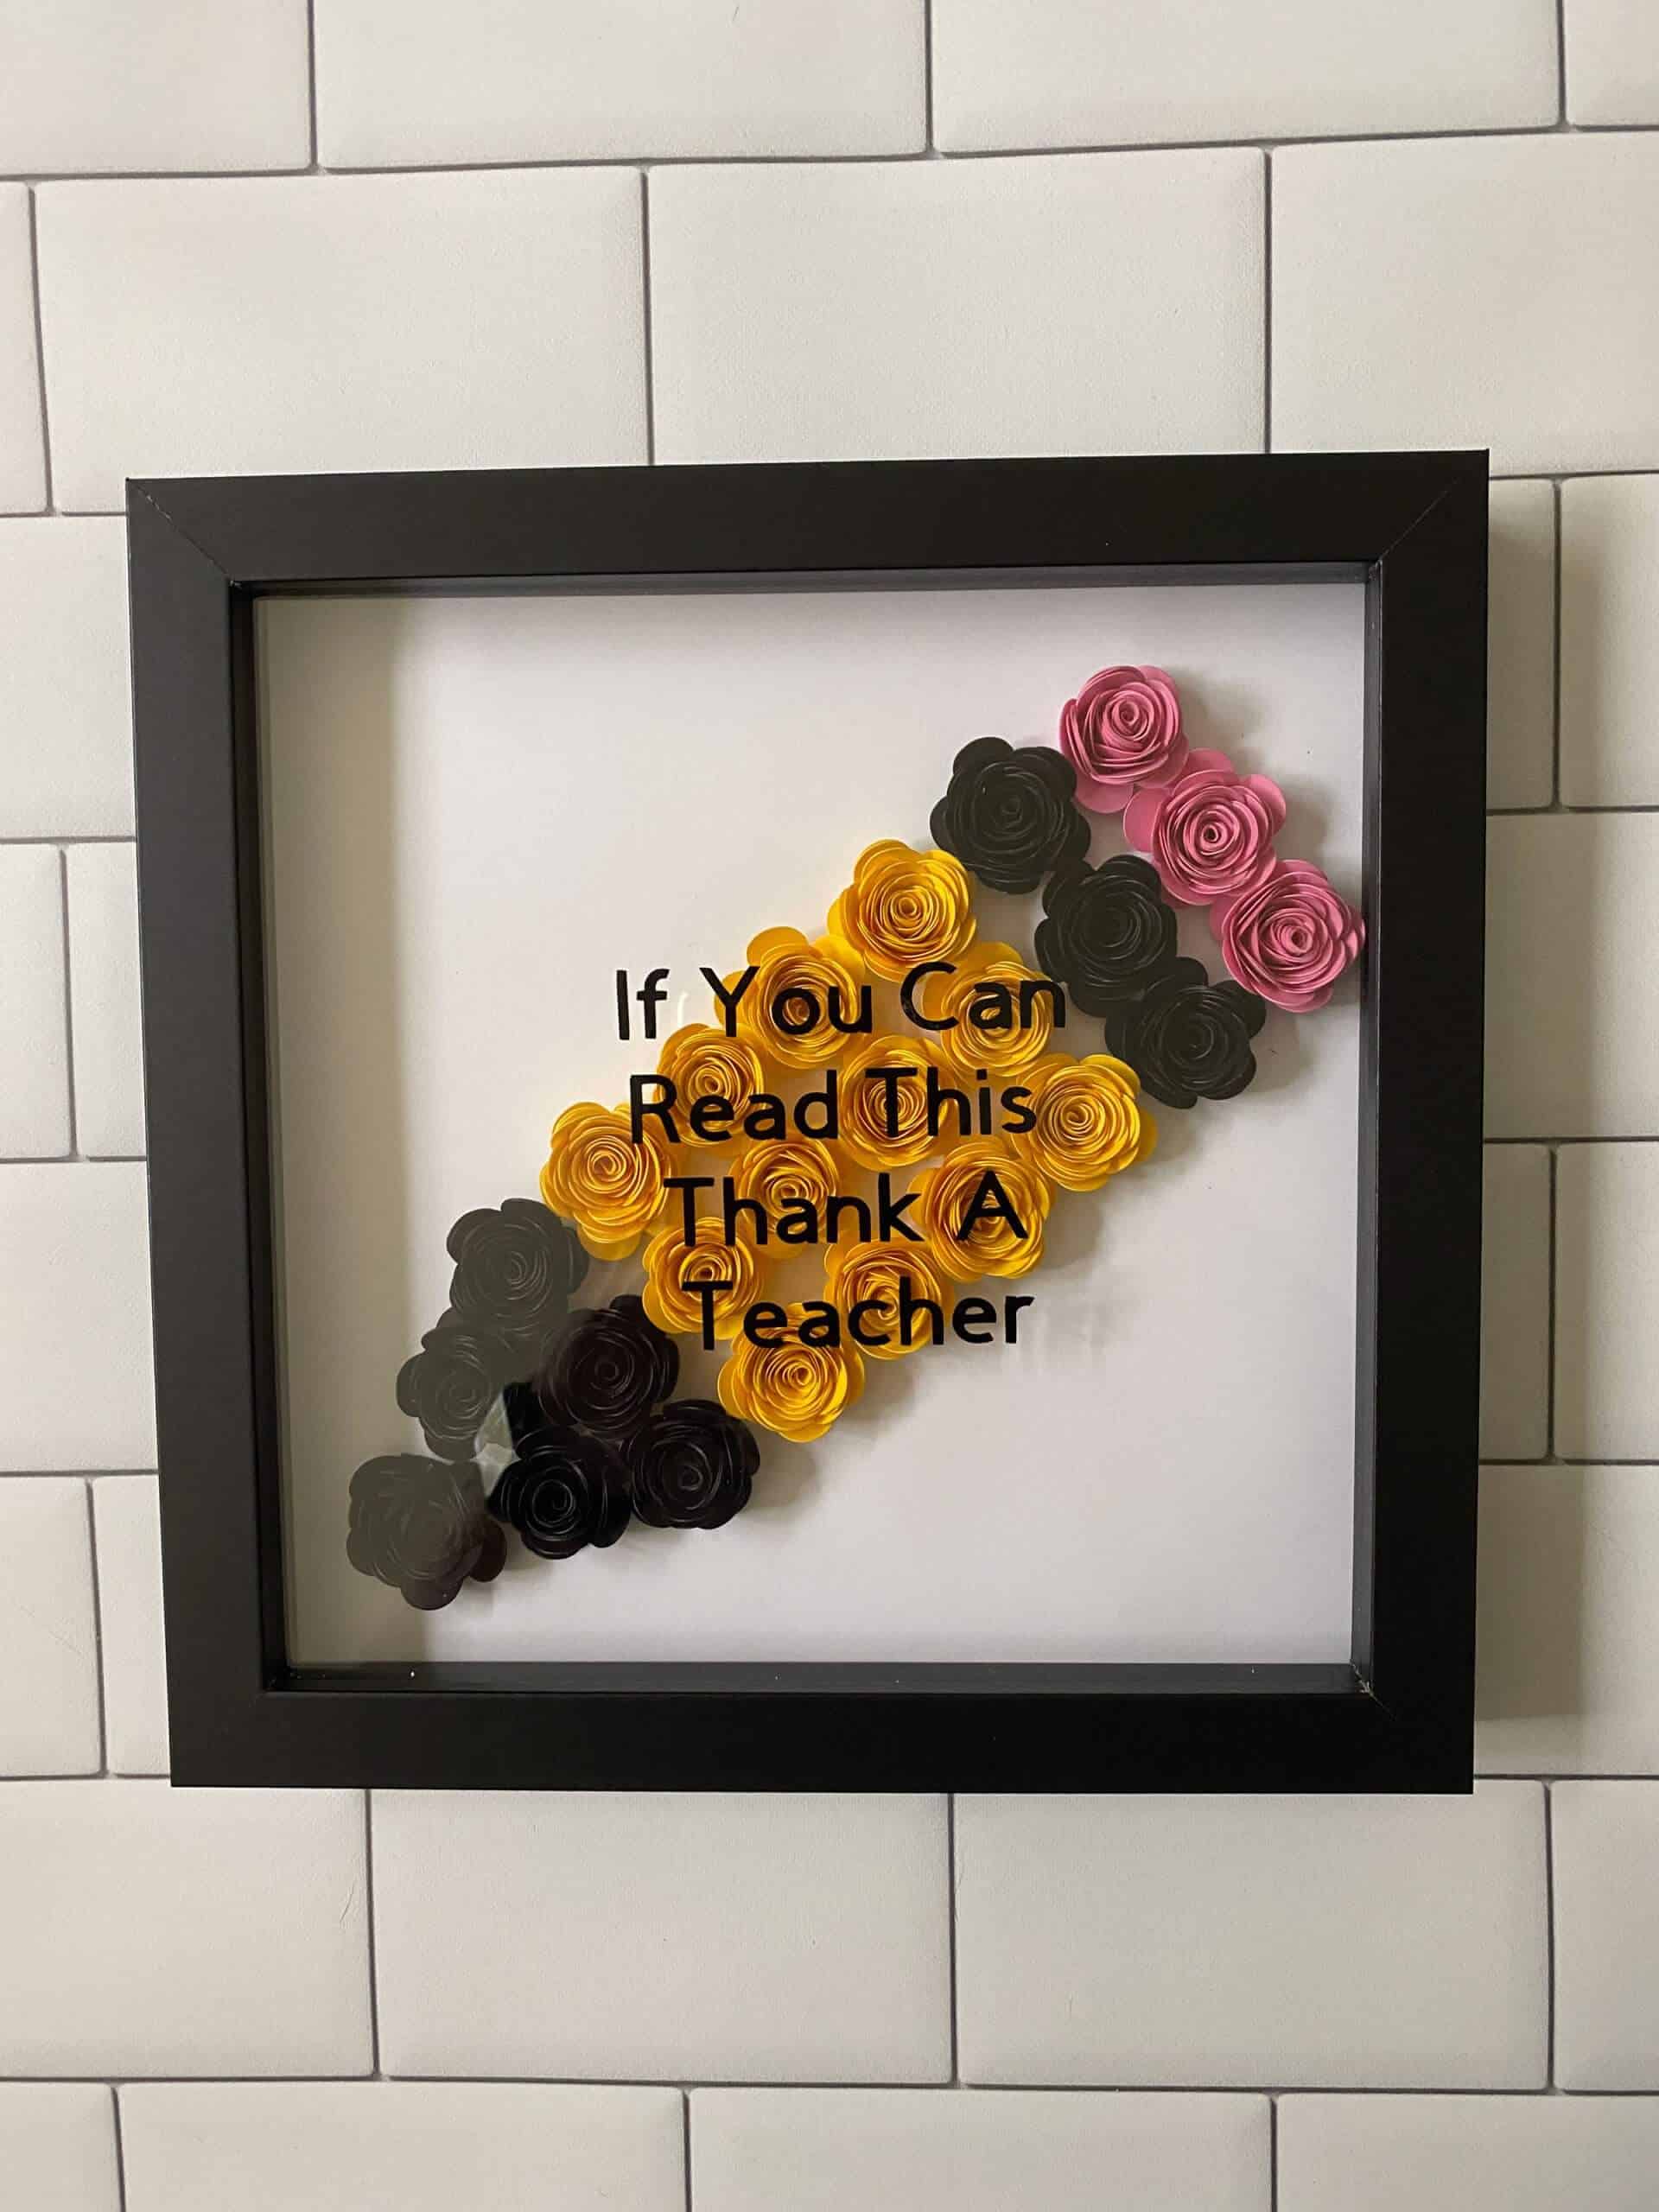
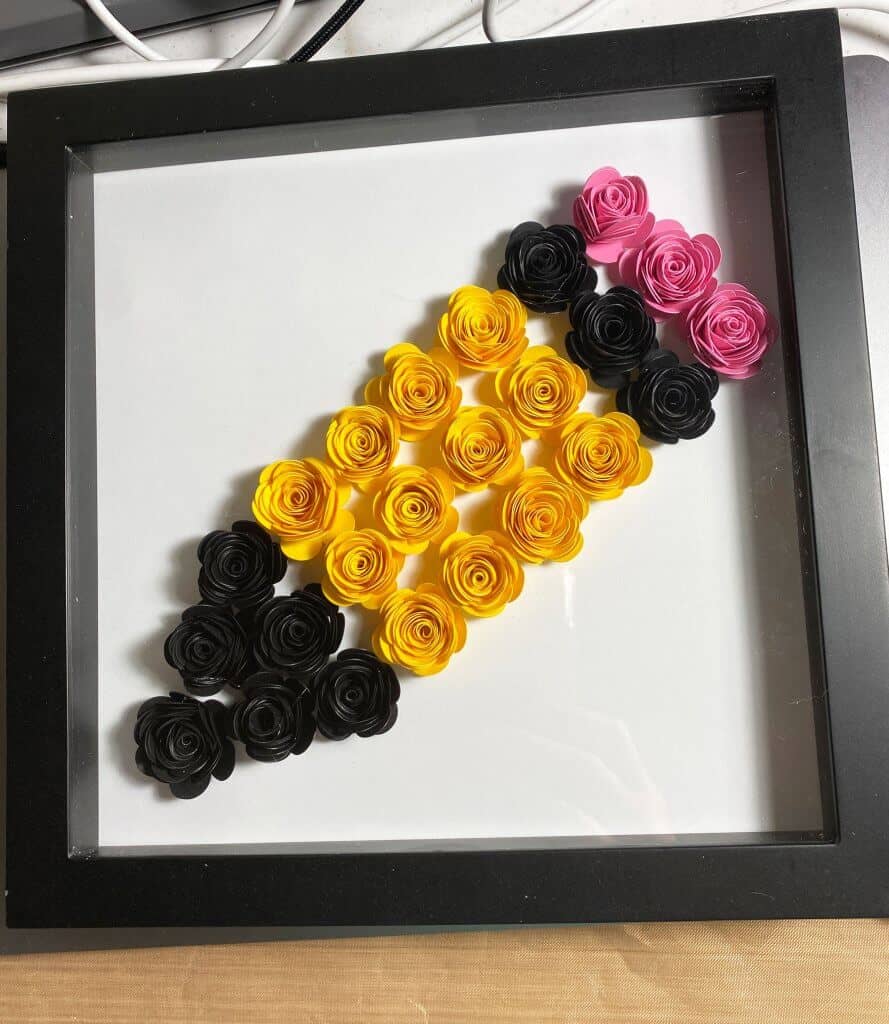
I cut out three pink flowers, 9 black flowers and 12 yellow flowers. I wasn’t able to find the yellow and pink cardstock I wanted from Cricut, so I that’s why I bought these two colors from Michael’s in 8.5″ x 8.5″.
After cutting out all of the flowers, I proceeded to roll them, one at a time, using the quilling tool and then hot gluing them to the tab on the bottom of the flower, as I went.
Putting It All Together
I cut out a piece of 8″ x 8″ white cardstock (you can use whatever you want) and arranged the pencil shape on the square cardstock, starting in the upper right hand corner. Once I had them arranged the way I wanted, I proceeded to hot glue the flowers in place. You can see from the picture where I placed each colors of the flowers.
I cut out the saying with my Cricut Maker using the StarCraft HD Glossy Permanent Black Vinyl. After cutting out the vinyl and weeding it, I used the transfer tape to put the vinyl onto the glass of the frame.

If you have a teacher friend, I bet they would love one of these. You can change the wording to whatever you want to personalize it.
Until next time.
Kathy
P.S. If you like this tutorial, join my Facebook community where I post other free SVG files and resources! I look forward to crafting with you!
P.S.S. If you’re thinking about getting a Cricut and you aren’t sure which one to get, this article might help you in your decision making process. The Cricut Maker vs. The Cricut Explore Air 2.
Get my free template (available in my Free Resource Library – get the password by filling out the form below).