
So I was trying to come up with a Christmas card I could make using the new Cricut Foil Transfer Kit and Foil Sheets. I got some ideas from Pinterest for my DIY Christmas card.
You can get my free template for this card, available in my Free Resource Library (get the password by filling out the form below).
Supplies Needed For This Project
This post contains some affiliate links for your convenience (which means if you make a purchase after clicking a link I will earn a small commission but it won’t cost you a penny more)! Read my full disclosure policy.
Adhesive Tape – 1/8″ & 1/4″ or Liquid Adhesive
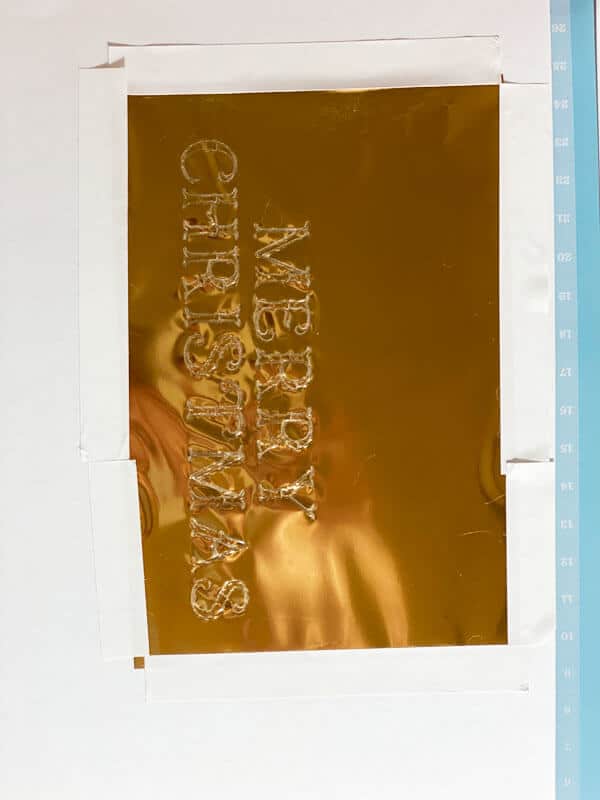
Transfer Foil Placement
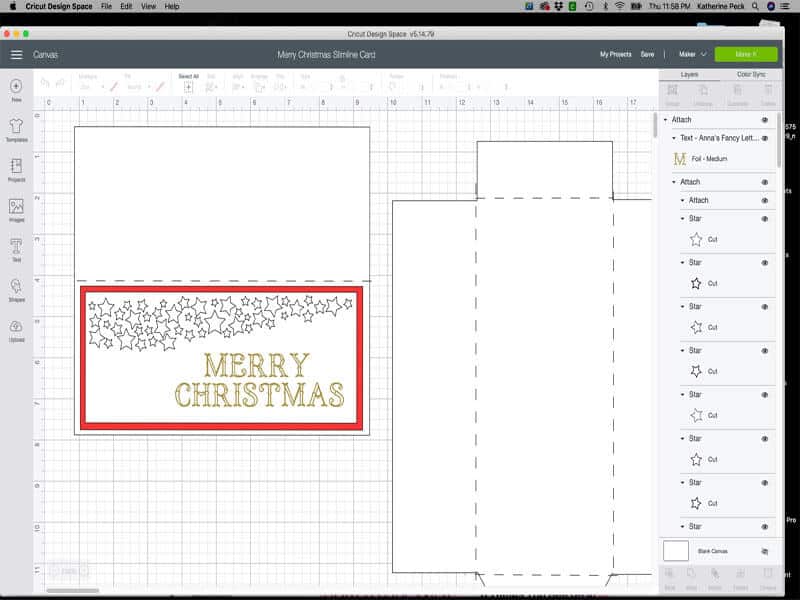
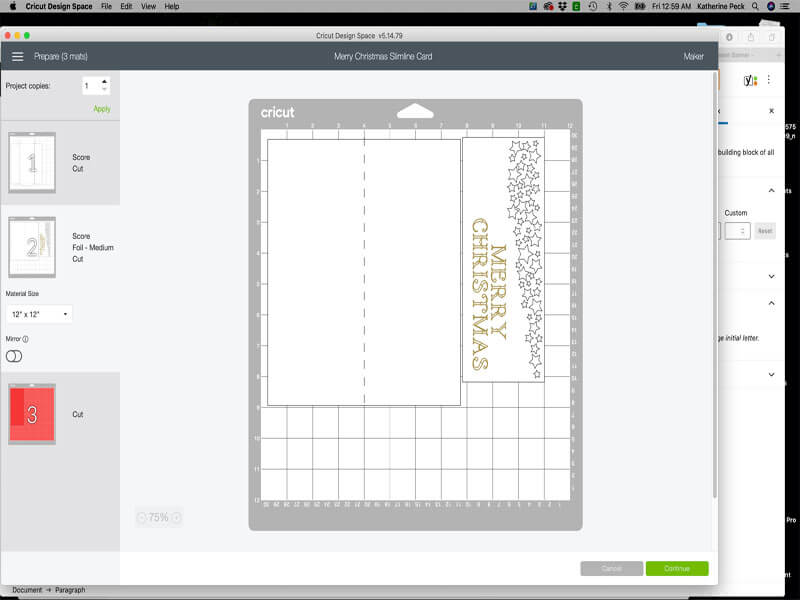
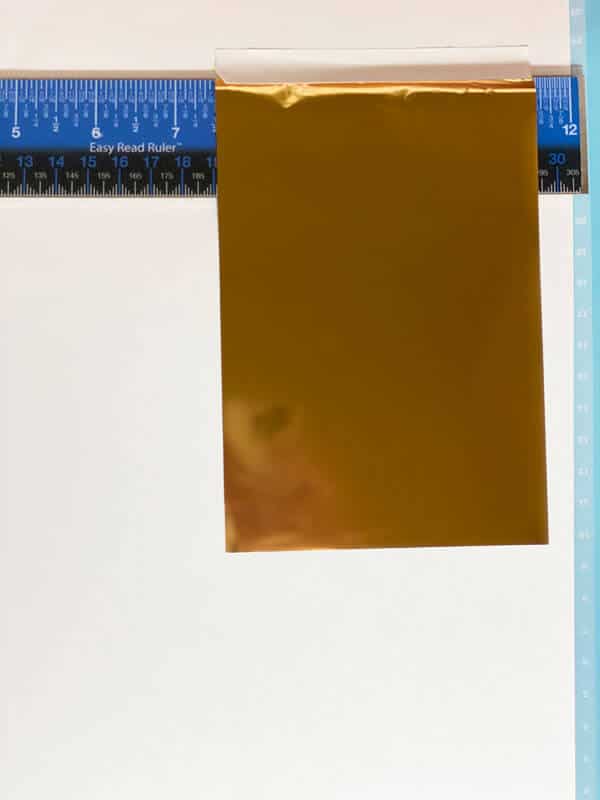
I made this card with my Cricut Maker. I finally figured out an easy way to place the Foil Transfer Sheet in the right place on the cardstock for my DIY Christmas card with the Foil Transfer Kit. It’s not rocket science but it really helped me a lot. First, I looked at the cutting mat in the Make It window when you go to cut the card, and saw where the words were on the vertical and horizontal rulers on the mat. I used a regular ruler and lined it up at 2.25 inches vertically and 7.5 inches horizontally, and that’s where I placed the foil. It made such a huge difference in making sure the foil was in the right place.
If you are using the Cricut tape that comes with the Foil Transfer Sheets, pat it on your clothes several times to get rid of some of the stickiness. I found that if I don’t do this before placing it on top of the foil and cardstock, it ripped my paper on more than one occasion.
For cardstock use the Light Cardstock setting, even if your cardstock is a little heavier. Set pressure on Less for the Maker. I forgot to do this on my card, so I had to redo it.
I no longer have an Explore Air 2 machine, so I am not able to test the pressure, however, I’ve read that it works well with the Default or More pressure setting.
Always do a test to see what works best for you.
It has been recommended that you move the star wheels to either side when foiling to keep them from leaving a mark on your project. I forgot to do this on my project, but luckily they didn’t leave a mark.
Pay Attention
Pay attention to the instructions on your screen to see what tip you need to use for which part of your design (it will be what setting you used when setting up your design) you are foiling and cutting. I messed up several times foiling and cutting out this card. One other tip, make sure you remember to take the foil sheet off once the foiling is done.
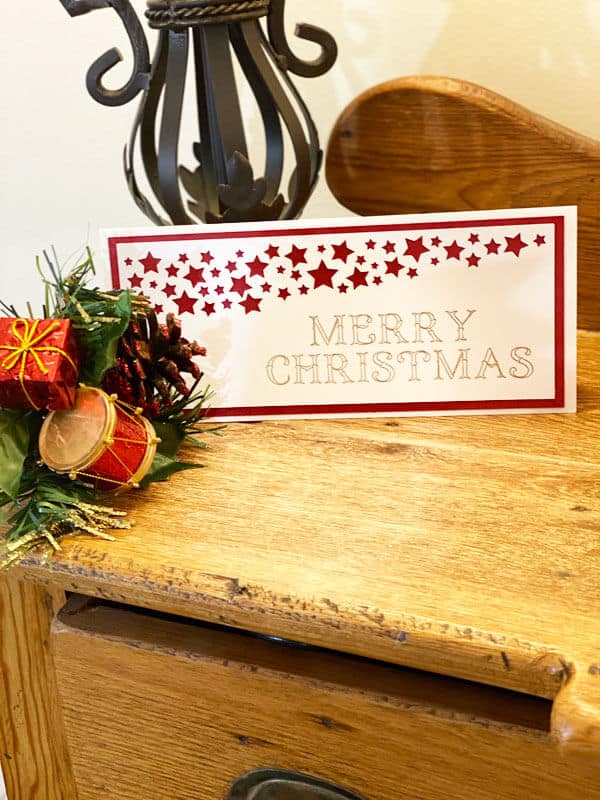
The Finished Card
Here’s the finished card. I really like how it came out. This is a great card to send to family and friends for Christmas.
I hope you will make this DIY Christmas card with the Foil Transfer Kit. If you do, please share it in my K Peck’s Creative Cafe Facebook group. I would love to see what you’ve made.
Until next time.
Kathy
P.S. If you like this tutorial, join my Facebook community where you can post your projects. I also post other free Design Space files and resources in the group. ! I look forward to crafting with you!
P.S.S. If you’re thinking about getting a Cricut and you aren’t sure which one to get, this article might help you in your decision making process. The Cricut Maker vs. The Cricut Explore Air 2.
You can get my free template for this card, available in my Free Resource Library (get the password by filling out the form below).
Thank you
Hi Judy,
You are welcome!!!
Thank you so much!
Hi Melissa,
You are welcome!!!